How To Apply CI/CD For Spring Boot
How To Apply CI/CD For Spring Boot
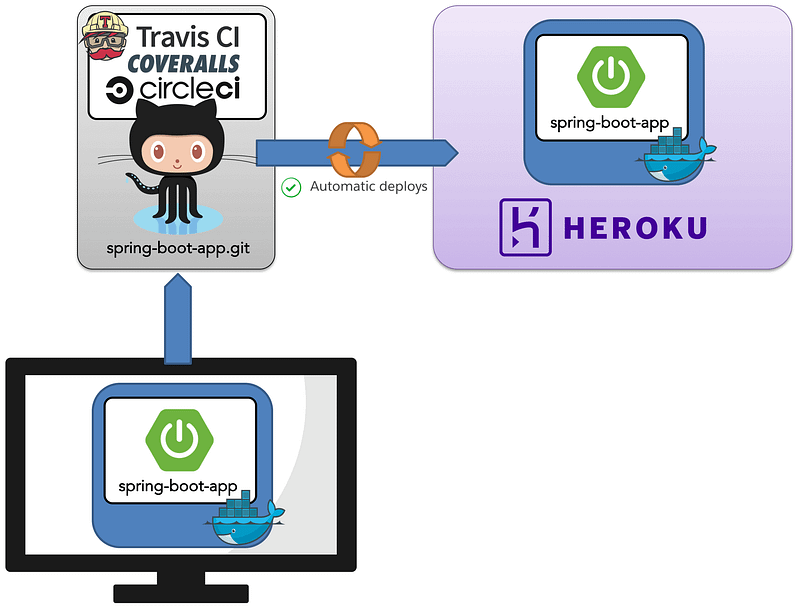
This article is about building Continuous Integration/Continuous Delivery (CI/CD) into Spring-Boot-based Java applications. First, let’s establish everything we will learn in this article:
Step 1) Create a Spring Boot Java App using Spring Initializr
Step 2) Create a GitHub repository
Step 3) Use Travis CI and Docker to implement CI/CD
Step 4) Add Codecov to provide code coverage
Step 5) Use SonarCloud to write stellar code
Step 6) Build a project site using GitHub site-maven-plugin
Step 7) Deploy the app on Heroku using heroku-maven-plugin
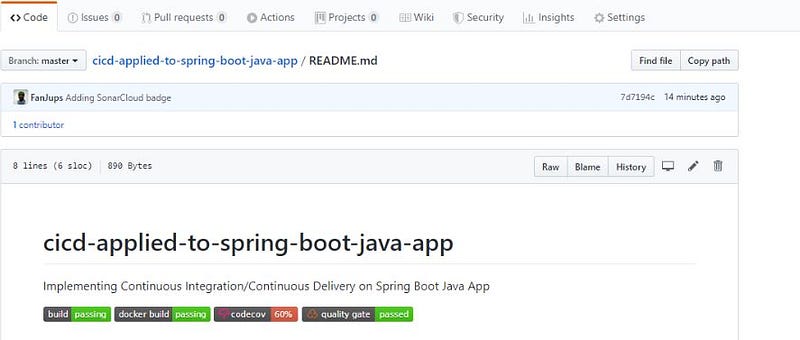
Gradually, we’ll add badges to the README.md file so that we can be notified in real-time on the state of Travis CI, Docker, Codecov, and SonarCloud. Also, we’ll add the license badge.
Are you ready? If not take time to better understand or prepare yourself and continue to read this later. The code is available here. So just fork, it’s all yours!
Step 1: Create a Spring Boot Java App Using Spring Initializr
In this project, I used Spring Tool Suite 4 (STS 4) IDE; you are free to use whatever tool you find suitable for this project. STS 4 has the Spring Initializr built-in, so that’s why I chose it for this project.
create a new spring starter project and fill the rest like the following.
Name: cicd-applied-to-spring-boot-java-app
Group: com.cicd
Artifact: cicd-applied-to-spring-boot-java-app
Description: Implementing CI/CD on Spring Boot Java App
Package: com.cicd.cicd-applied-to-spring-boot-java-app
By default:
Type: Maven
Packaging: jar
Java Version: 8
Language: Java
or you can fill with your own details as your interest.
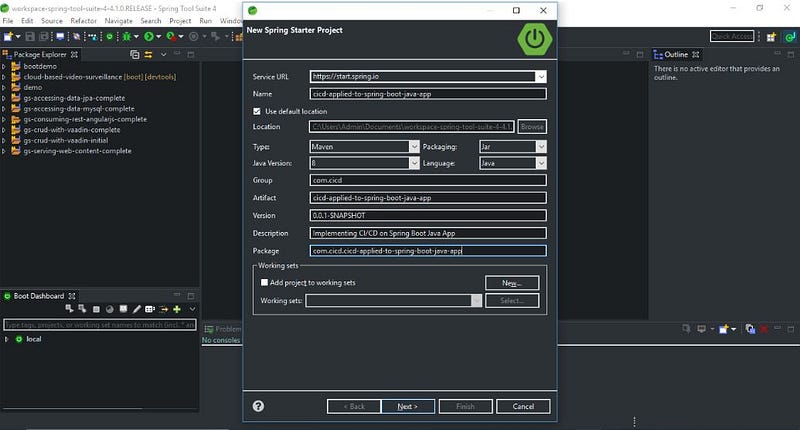
Then choose the spring web and finish.
Next, please open the CicdAppliedToSpringBootJavaAppApplication.java file.
We can then add a basic endpoint:
package com.cicd.cicdappliedtospringbootjavaapp;
import org.springframework.boot.SpringApplication;
import org.springframework.boot.autoconfigure.SpringBootApplication;
@SpringBootApplication
@RestController
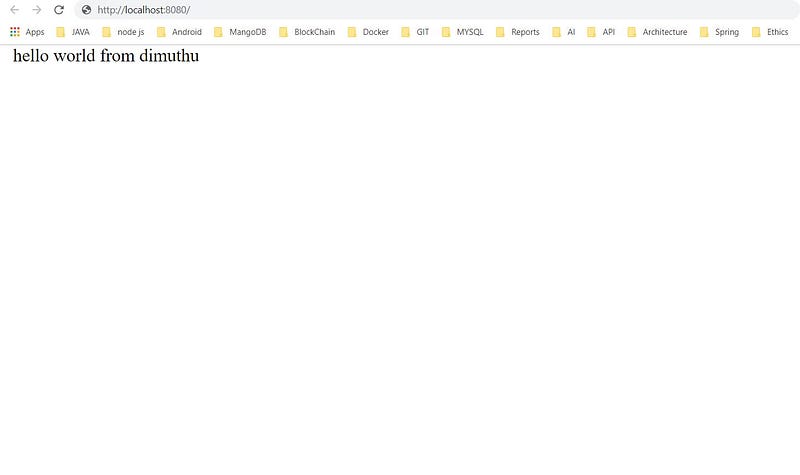
public class CicdAppliedToSpringBootJavaAppApplication {@GetMapping("/")
public String home(){
return "hello world from dimuthu";
}public static void main(String[] args) {SpringApplication.run(CicdAppliedToSpringBootJavaAppApplication.class, args);
}
}
Then right-click on the project and click Run as-> Maven Build
To run the app, please add the following:
Goals -> spring-boot:run
After set goals click Run.
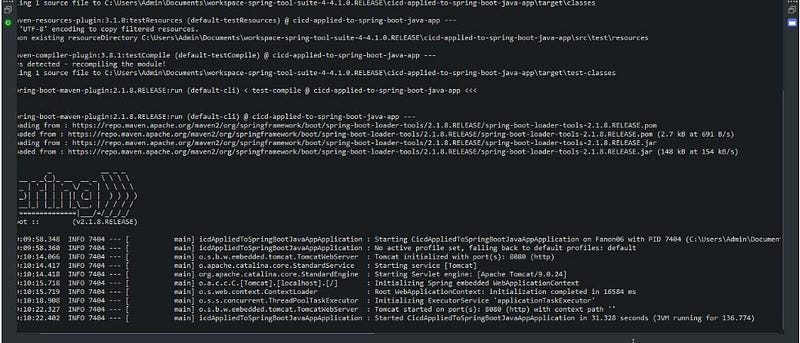
The final result can be found here: http://localhost:8080/
Now, on to the next step!
Step 2: Create a GitHub Repository
In this step, we need to create a Github repository.
Repository name: cicd-applied-to-spring-boot-java-app (I chose to set the same name as the artifact field from step one)
Description: Implementing Continuous Integration/Continuous Delivery on Spring Boot Java App
Click on Public
Click on Initialize this repository with a README
Select the MIT license.
Why? It's very simple. The following links are helpful to better understand why you need an MIT license. Here's how to choose an open-source license and how open-source licenses work and how to add them to your projects.
Later, we'll add the .gitignore file.
After created we need to clone it. Then our coded files should copy to this local repository.
Then we can add the .gitignore file as follows.
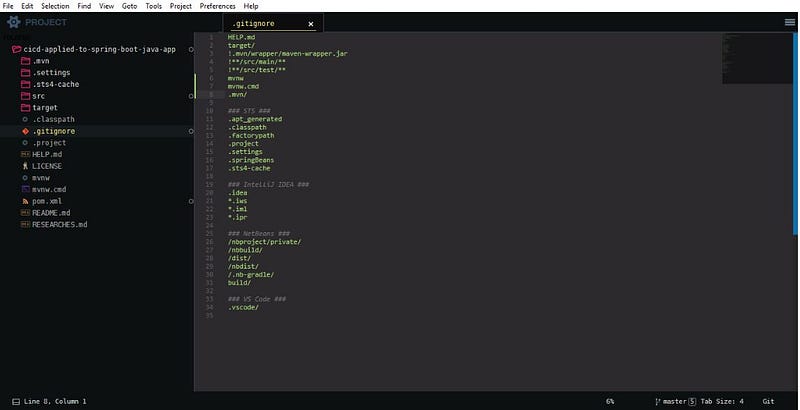
finally, we can push it to our remote repository.
Step 3: Use Travis CI and Docker to Implement CI/CD
Note: If you’re not familiar with either of these tools, check out this Travis CI Tutorial and Docker Getting Started tutorial to help you get started.
Sign up or sign in with GitHub and make sure Travis CI has access to your repository. Then, create a file named .travis.yml, which contains instructions that Travis CI will follow.
Change the details about the name and password of docker in .travis.yml otherwise, t will give build errors.
It’s important to know that, for every change you make, Travis CI will trigger a build and send an email. It’s a continuous process.
If you need to add Travis badge you can add it from here:
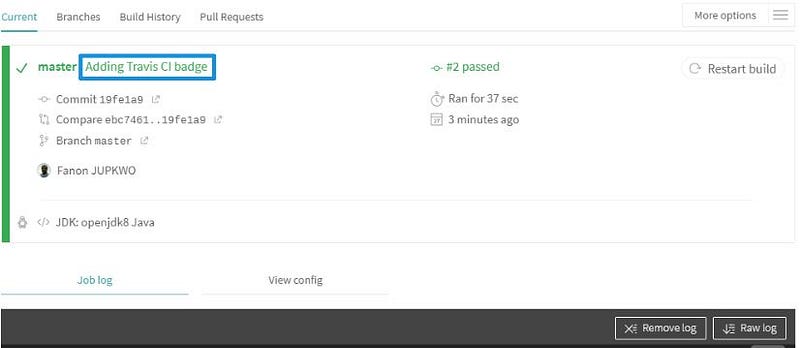
We successfully added Travis CI and its badge. Next, we’ll focus on Docker.
First, sign in or sign up on Docker Hub:
create a repository with the following details:
Fill out the form as follows:
Name: cicd-applied-to-spring-boot-java-app (GitHub repository name)
Description: Implementing Continuous Integration/Continuous Delivery on Spring Boot Java App (GitHub repository description)
Visibility: choose Public
Build Settings: select GitHub
After clicking on the Create button:
Then it’s time to link our Docker repository to our GitHub repository. Click on Builds:
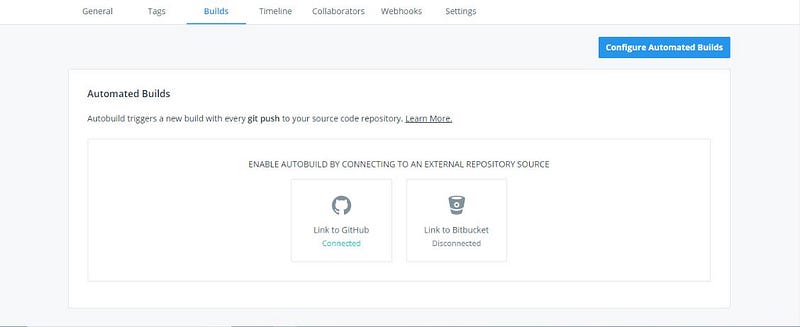
Then select your Github repository.
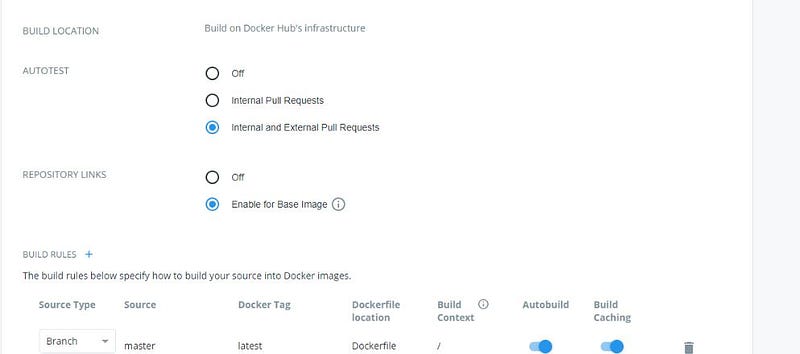
Now that the GitHub repository is selected, we need to make some changes:
Autotest: select Internal and External Pull Requests
Repository links: select Enable for Base Image
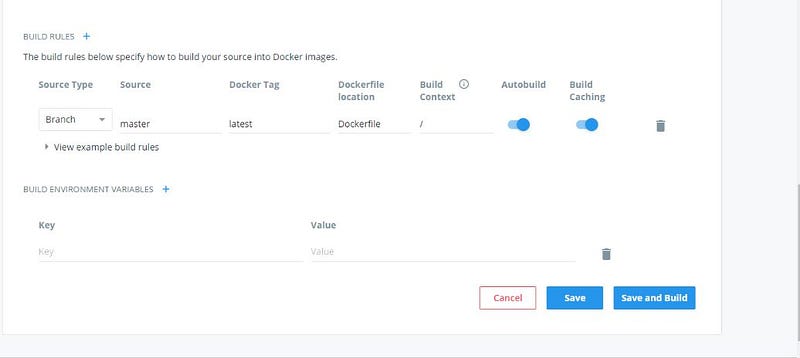
After save we succeed to link our GitHub repository to the Docker repository. If you need help with Docker builds, this link is helpful.
What’s next? First, we’ll install Docker. Then we’ll make some changes to the code and Travis CI.
To install Docker, go to Docker’s Get Started page, select Docker for Developers, and click on Download Desktop and Take a Tutorial.
After installing, To make sure you’ve installed Docker and verify it’s running properly, open your command line, and write “docker.” Then validate.
Now, go back to your IDE or text editor; we’ll make some changes to the code.
Create a file named “Dockerfile.” To sum up, what we’ve done so far, the Dockerile is useful when creating Docker images. To better understand the purpose of this file, this Dockerfile reference will help you.
To keep things simple, I use this Callicoder Dockerfile example and make little changes. This is what the Dockerfile looks like:
Here’s the Dockerfile creating a process using STS 4:
Select the project, then click on New -> File
Fill the file name field with “Dockerfile” and click the Finish button. Then Copy and paste the content of Dockerfile presented previously.
Before making some changes to the pom.xml, let’s look at the actual content:
We add Spotify’s dockerfile-maven-plugin to push the project on Docker Hub:
Furthermore, we add maven-dependency-plugin as explained in this Getting Started With Spring Boot and Docker, which states:
“… to ensure the jar is unpacked before the Docker image is created, we add some configuration for the dependency plugin.”
To continue, we will link Travis CI to Docker from our GitHub repository.
Do you remember your Docker username and password? Well, you will have to do so in order to proceed. We will create two environment variables in Travis CI.
To get there, just copy and paste this (https://travis-ci.com/GITHUBUSERNAME/cicd-applied-to-spring-boot-java-app) in your browser. But replace GITHUBUSERNAME with your correct username or click on your Travis CI badge present in README.md.
Click on More options -> Settings on Travis project dashboard.
Under Environmental Variables :
Fill in the form as follows:
Name: DOCKER_PASSWORD
Value: yourdockerpassword
Click Add button
Name: DOCKER_USERNAME
Value: yourdockerusername
Click Add button
To deploy on Docker, we’ll use “mvn deploy” as explained by Spotify. The Apache Maven Project explains the role of the Apache Maven Deploy Plugin as a plugin used to “add artifacts to a remote repository.”
But we don’t want to add artifacts to a remote repository, we just want to deploy it on Docker. So, when we call the deploy phase, we must include a valid <distributionManagement/> section POM. However, that’s not the purpose here. Thus, we’ll add this property in pom.xml:
<maven.deploy.skip>true</maven.deploy.skip>
If we don’t add this property, this error will occur:
“[ERROR] Failed to execute goal org.apache.maven.plugins:maven-deploy-plugin:2.8.2:deploy (default-deploy) on project cicd-applied-to-spring-boot-java-app: Deployment failed: repository element was not specified in the POM inside distributionManagement element or in -DaltDeploymentRepository=id::layout::url parameter -> [Help 1]”.
At this stage, it’s time to use those two Docker environment variables. Just copy and paste this new .travis.yml and push it on GitHub.(it is already done in the code)

Commit description: “Linking Travis CI to Docker”
We received a red cross and Travis CI badge, meaning a beautiful error! But ignore that for now, we’ll correct it later!
Ladies and gentlemen, I’m happy to present to you: our beautiful error! Just go to the Travis CI repository and check out the beautiful build log:
The command “mvn deploy” exited with 1.
We’ve already added the Travis CI badge. Now, it’s time to do the same for Docker. Go to https://shields.io/.
On the search bar, write “docker.” Then, we’ll get the following results:
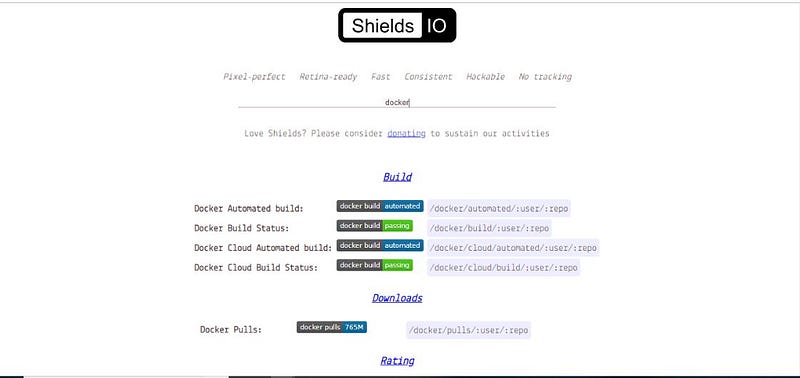
Click on Docker Cloud Build Status:
What if I told you we’ll get an error here also?
Nevermind, just fill the following form:
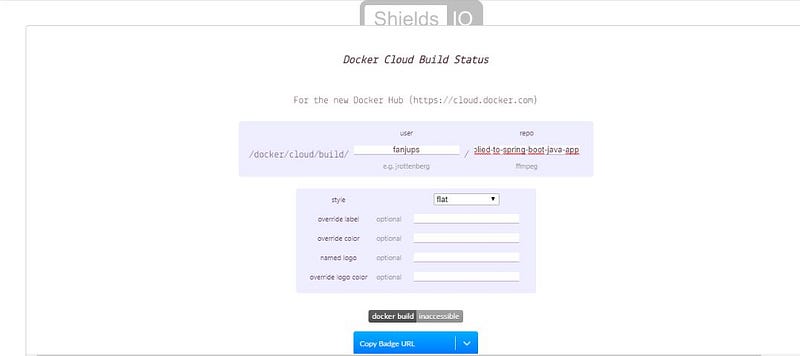
Click on the Copy Badge URL.
Now, go back to the GitHub repository and edit README.md. We’ll add the following Docker badge. (already done in the readme file)
Ladies and gentlemen, we are all winners here. So let’s get it right!
Previously, we made changes on the pom.xml and created a Dockerfile.
All of those errors occurred due to the fact that Maven didn’t know how to handle the deployment on Docker and the Dockerfile was absent so it was impossible to push images.
The time has come to push those changes (Dockefile and pom.xml) on GitHub using GitHub Desktop.
Ladies and gentlemen, who are we now? Winners!
Now, we have two green badges meaning success!
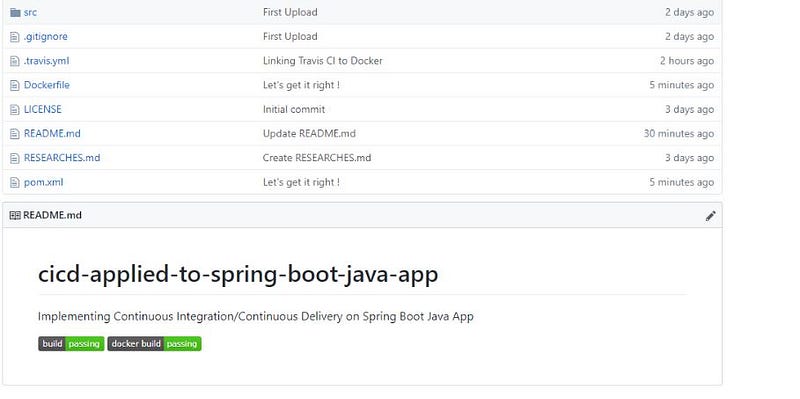
To be sure, check your emails. You should have received two emails: one from Travis CI and the other from Docker.
Before moving on to step three, we’ll run the app without using Docker only. Just remember to replace “DimuthuKasunWP” with your own Docker Hub username.
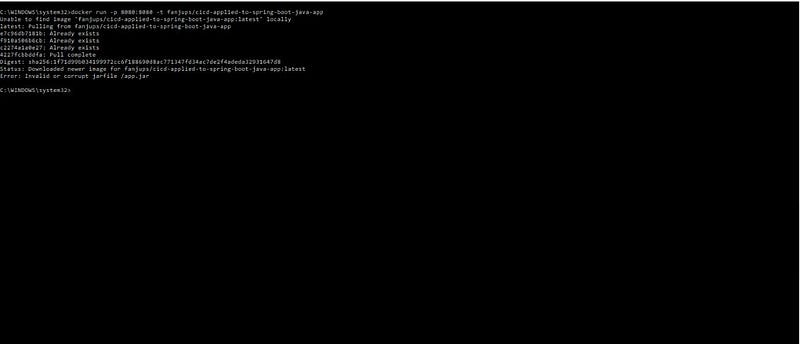
I got the following error: “Invalid or corrupt jarfile /app.jar.” It’s all about encoding, so I’ll add those two properties to the pom.xml.
Now, it’s time to commit on GitHub. If you’re confused about writing useful commit messages, this article is for you.
Before running the app again, it’s important to list all containers using docker ps.
Then check the “CONTAINER ID,” stop (docker stop “CONTAINER ID”), and remove it (docker rm “CONTAINER ID”) because it’s persisted, as explained by this post on Spring Boot with Docker.
Then, we’ll run again the app to ensure that everything works well:
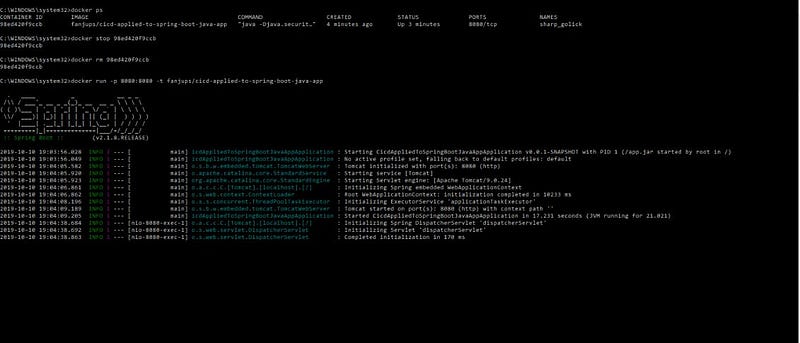
I was so happy when I solved this problem!
The core steps are now over. We’ve successfully implemented the CI/CD. Now, let’s add some useful tools!
Step 4: Add Codecov for Code Coverage
First, make sure you’ve updated the project on your computer.Click on Pull Origin.
Copy the modified files which we’ll use in IDE from our GitHub folder and then paste them into our workspace. In this case, we’ll only copy and paste the pom.xml.
Don’t forget to refresh the project on STS 4 and do whatever it takes to include changes.
To better use this tool, we make some changes by adding a unit test.
First, create a new package — com.cicd.cicdappliedtospringbootjavaapp.controller.
Secondly, create a new class HelloController.java and change CicdAppliedToSpringBootJavaAppApplication.java file.
Before running the app on your computer, you can skip the entire dockerfile plugin because the deployment will take place on the GitHub repository managed by Travis CI.
To do this, just add this option (-Ddockerfile.skip), as explained by Spotify dockerfile-maven-plugin’s usage, to your Maven command. Finally, we get mvn spring-boot:run -Ddockerfile.skip.
Now, log in or sign up to Codecov with GitHub.
Click on Account -> Repositories -> Add new repository
Just choose your GitHub repository or follow this link https://codecov.io/gh/GITHUB_USERNAME/GITHUB_REPOSITORY. But remember to replace GITHUB_REPOSITORY with cicd-applied-to-spring-boot-java-app and the GITHUB_USERNAME with yours.
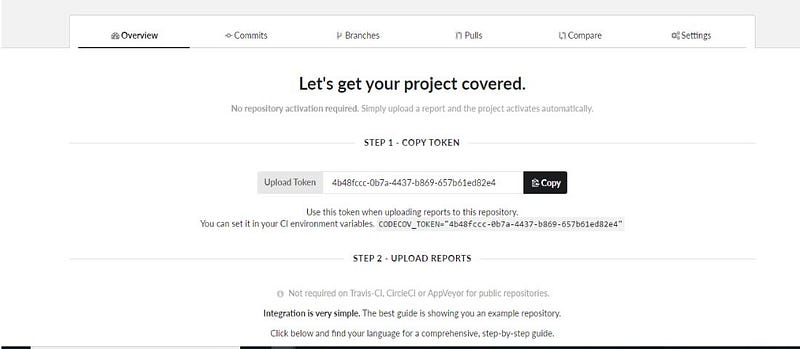
Last time, we added two environment variables to Docker. Now, we added the Codecov environment variable: CODECOV_TOKEN, as well. Copy your token and add it to your Travis CI repository.
We made some changes to the pom.xml by adding the jacoco-maven-plugin.
Go back to GitHub repository and we’ll edit .travis.yml.
What Time Is it? Codecov Badge Time!
Go to your Codecov repository and Click on Settings -> Badge -> Copy (from Markdown).
Then, go to your GitHub repository and paste it into README.md.
Finally, push your changes from your computer to GitHub.
Code Coverage: 60%
Perhaps, you want to deactivate the coverage and activate it later. If so, go ahead and create a file named codecov.yml. Now, it’s useful to know coverage so I’ll comment each line with “#.”
If you wish to learn more, click here to read the docs.
Now, on to step 5!
Step 5: Use SonarCloud to Write Great Code
To start, log in or sign up with GitHub.
Click on + (Analyze new project or create new organization) -> Analyze new project -> Import another organization -> Choose an organization on GitHub
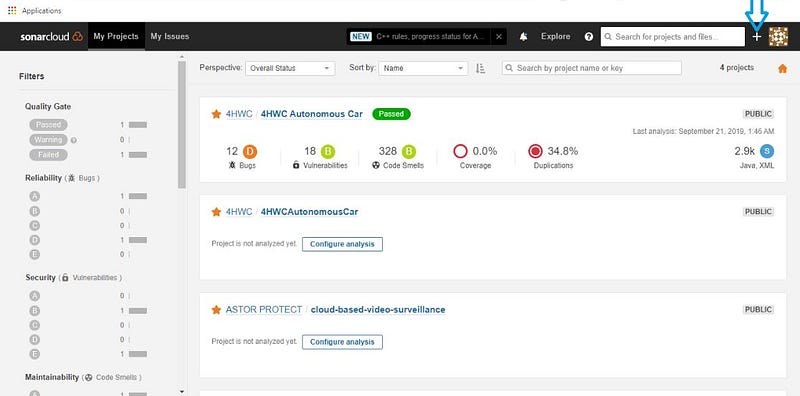
Next, make sure SonarCloud has access to your GitHub repository.
Now that we’re back to SonarCloud, choose a Key. I suggest using “cicd-applied-to-spring-boot-java-app” as the Key.
Then, click on Continue -> Choose Free plan -> Create Organization -> Analyze new project -> Select your GitHub repository -> Set Up -> With Travis CI -> Provide and encrypt your token -> Copy
Go back to Travis CI and create a SonarCloud environment variable named SONAR_TOKEN. As a value, paste the token you’ve just copied.
Now, back to SonarCloud and click on Continue -> Edit your .travis.yml file -> Choose Maven as build technology -> Configure your platform -> Configure the scanner -> Copy.
I chose to write SonarCloud script under after_success instead of script because I focus on deployment here. You are free to place it where you want.
Also, create a file named sonar-project.properties and edit as follows: sonar.projectKey=GITHUBUSERNAME_cicd-applied-to-spring-boot-java-app
Go back to SonarCloud and click on Finish.
To end, we add a SonarCloud badge into README.md.
To get the badge for another project, use groupId:artifactId.
Here’s the SonarCloud badge already added:
Now, on to step 6!
Step 6: Build a Project Site Using the GitHub site-maven-plugin
To get started, open pom.xml on your computer. We add:
1) OAuth token and GitHub servers as properties
2) org.apache.maven.plugins:maven-site-plugin
3) com.github.github:site-maven-plugin
4) org.apache.maven.plugins:maven-project-info-reports-plugin
5) developers section
6) organization section
7) issueManagement section
8) Software Configuration Management (SCM) section
“The important configuration is to allow the OAuth token to be read from an environment variable (excerpt from pom.xml)” as explained by Michael Lanyon’s blog. “To create the token, follow these instructions”.
Copy the token, then create a new environment variable named GITHUB_OAUTH_TOKEN.
Push pom.xml to GitHub and edit .travis.yml by adding “- mvn site” under after_success.
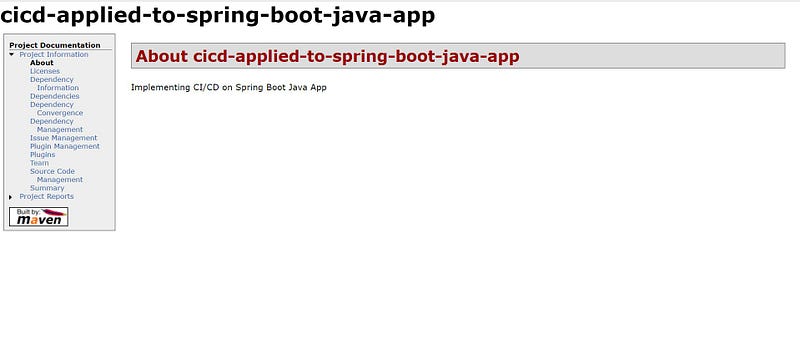
After pushing all changes, gh-pages branch and project site are created. Each time you push, the site will be updated if necessary.
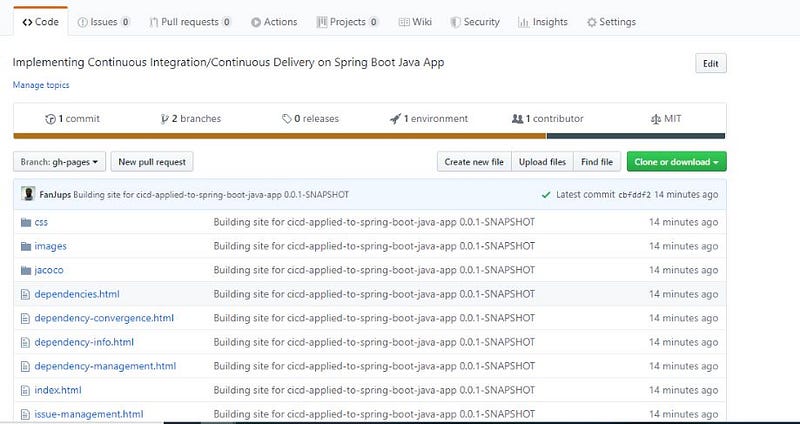
To see the site, click on environment -> View deployment (under Deployed to github-pages).
Ok, great. Now, let’s move on to step 7!
Step 7: Deploy the App on Heroku Using heroku-maven-plugin
Here we go! Log in or sign up for Heroku.
Click on New -> Create new app. To continue, enter an app name (cicd-spring-boot-java-app). cicd-applied-to-spring-boot-java-app is too long as an app name. Choose a region and click Create app.
Next, click Connect to GitHub.
Search the GitHub repository. Once you find it, click Connect.
Check Wait for CI to pass before deploy.
Click Enable Automatic Deploys.
Go to Account settings.
Copy your API KEY and create a new Travis CI environment variable named HEROKU_API_KEY. This the last environment variable linked to this project.
It’s time to edit pom.xml and push to GitHub. We add:
1) full-artifact-name as a property
2) com.heroku.sdk:heroku-maven-plugin
Now, we focus on .travis.yml.
- To deploy on Docker Hub, we used mvn deploy.
- To deploy on Heroku, we’ll use mvn heroku:deploy.
- In order to deploy on Docker and Heroku, we’ll repeat the deploy phase twice, and risk exceeding timeout.
- To avoid that, we’ll only use mvn heroku:deploy.

Conclusion
Congratulations! You’re all done. To sum things up, you learned how to implement CI/CD on a Spring Boot Java app using Maven, GitHub, Travis CI, Docker, Codecov, SonarCloud, and Heroku. This is a template you are free to use.
If you’re confused, please ask in the comments. I also suggest reading the docs available, as many times as necessary.
The code is available here. So just fork, it’s all yours!