Gender and Age Detection In Python with OpenCV
Gender and Age Detection In Python with OpenCV
Computer Vision is a field of study that enables computers to see and identify digital images and videos as a human would. The challenges it faces largely follow from the limited understanding of the biological vision. Computer Vision involves acquiring, processing, analyzing, and understanding digital images to extract high-dimensional data from the real world in order to generate symbolic or numerical information that can then be used to make decisions. The process often includes practices like object recognition, video tracking, motion estimation, and image restoration.
What is OpenCV?
OpenCV is short for Open Source Computer Vision. Intuitively by the name, it is an open-source Computer Vision and Machine Learning library. This library is capable of processing real-time images and videos while also boasting analytical capabilities. It supports the Deep Learning frameworks TensorFlow, Caffe, and PyTorch.
What is a CNN?
A Convolutional Neural Network is a deep neural network (DNN) widely used for the purposes of image recognition and processing and NLP. Also known as a ConvNet, CNN has input and output layers, and multiple hidden layers, many of which are convolutional. In a way, CNNs are regularized multilayer perceptrons.
Gender and Age Detection Python Project- Objective
To build a gender and age detector that can approximately guess the gender and age of the person (face) in a picture using Deep Learning on the Adience dataset.
Gender and Age Detection — About the Project
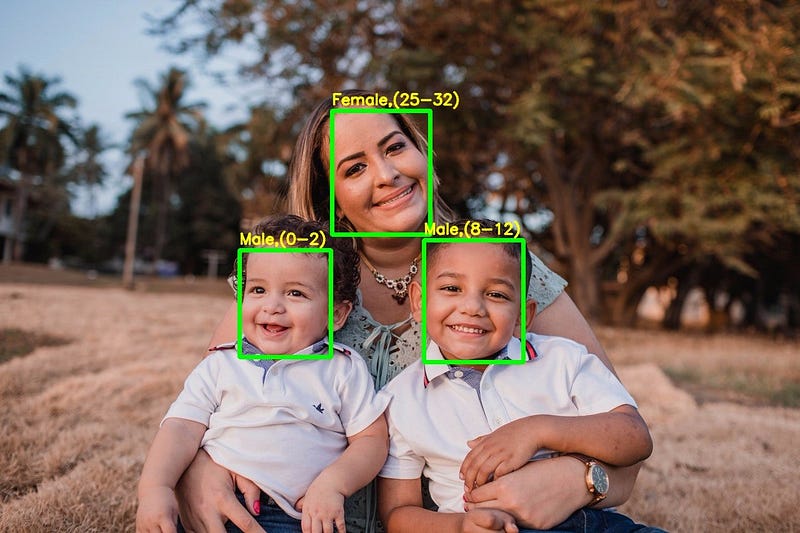
In this Python Project, I will use Deep Learning to accurately identify the gender and age of a person from a single image of a face. I will use the models trained by Tal Hassner and Gil Levi. The predicted gender may be one of ‘Male’ and ‘Female’, and the predicted age may be one of the following ranges- (0–2), (4–6), (8–12), (15–20), (25–32), (38–43), (48–53), (60–100) (8 nodes in the final softmax layer). It is very difficult to accurately guess the exact age from a single image because of factors like makeup, lighting, obstructions, and facial expressions. And so, I make this a classification problem instead of making it one of regression.
The CNN Architecture
The convolutional neural network for this python project has 3 convolutional layers.similar to the CaffeNet and AlexNet. The network uses 3 convolutional layers, 2 fully connected layers, and a final output layer. The details of the layers are given below.
- Convolutional layer; 96 nodes, kernel size 7
- Convolutional layer; 256 nodes, kernel size 5
- Convolutional layer; 384 nodes, kernel size 3
It has 2 fully connected layers, each with 512 nodes, and a final output layer of softmax type.
To go about the python project, I’ll:
- Detect faces
- Classify into Male/Female
- Classify into one of the 8 age ranges
- Put the results on the image and display it
The Dataset
For this python project, I’ll use the Adience dataset; the dataset is available in the public domain and you can find it here. This dataset serves as a benchmark for face photos and is inclusive of various real-world imaging conditions like noise, lighting, pose, and appearance. The images have been collected from Flickr albums and distributed under the Creative Commons (CC) license. It has a total of 26,580 photos of 2,284 subjects in eight age ranges (as mentioned above) and is about 1GB in size. The models I will use have been trained on this dataset.
Also, If you want different dataset I suggest Adience dataset for training the model.
Prerequisites
You’ll need to install OpenCV (cv2) to be able to run this project. You can do this with pip-
pip install opencv-python
Other packages you’ll be needing are math and argparse, but those come as part of the standard Python library.
Steps for practicing gender and age detection python project
- Download this zip. Unzip it and put its contents in a directory you’ll call gad.
The contents of this zip are:
- opencv_face_detector.pbtxt
- opencv_face_detector_uint8.pb
- age_deploy.prototxt
- age_net.caffemodel
- gender_deploy.prototxt
- gender_net.caffemodel
- a few pictures to try the project on
For face detection, I have a .pb file- this is a protobuf file (protocol buffer); it holds the graph definition and the trained weights of the model. I can use this to run the trained model. And while a .pb file holds the protobuf in binary format, one with the .pbtxt extension holds it in text format. These are TensorFlow files. For age and gender, the .prototxt files describe the network configuration and the .caffemodel file defines the internal states of the parameters of the layers.
2. I use the argparse library to create an argument parser so we can get the image argument from the command prompt. I make it parse the argument holding the path to the image to classify gender and age for.
3. For the face, age, and gender, initialize protocol buffer, and model.
4. Initialize the mean values for the model and the lists of age ranges and genders to classify from.
5. Now, use the readNet() method to load the networks. The first parameter holds trained weights and the second carries network configuration.
6. Let’s capture video stream in case you’d like to classify it on a webcam’s stream. Set padding to 20.
7. Now until any key is pressed, I read the stream and store the content into the names hasFrame and frame. If it isn’t a video, it must wait, and so we call up waitKey() from cv2, then break.
8. Let’s make a call to the highlightFace() function with the faceNet and frame parameters, and what this returns, I will store in the names resultImg and faceBoxes. And if I got 0 faceBoxes, it means there was no face to detect.
Here, net is faceNet- this model is the DNN Face Detector and holds only about 2.7MB on disk.
- Create a shallow copy of the frame and get its height and width.
- Create a blob from the shallow copy.
- Set the input and make a forward pass to the network.
- faceBoxes is an empty list now. for each value in 0 to 127, define the confidence (between 0 and 1). Wherever I find the confidence greater than the confidence threshold, which is 0.7, we get the x1, y1, x2, and y2 coordinates and append a list of those to faceBoxes.
- Then, I put up rectangles on the image for each such list of coordinates and return two things: the shallow copy and the list of faceBoxes.
9. But if there are indeed faceBoxes, for each of those, I define the face, create a 4-dimensional blob from the image. In doing this, I scale it, resize it, and pass in the mean values.
10. I feed the input and give the network a forward pass to get the confidence of the two classes. Whichever is higher, that is the gender of the person in the picture.
11. Then, I do the same thing for age.
12. I’ll add the gender and age texts to the resulting image and display it with imshow().
Let’s follow these steps slowly.
1.1. Gender Prediction
They have framed Gender Prediction as a classification problem. The output layer in the gender prediction network is of type softmax with 2 nodes indicating the two classes “Male” and “Female”.
1.2. Age Prediction
Ideally, Age Prediction should be approached as a Regression problem since we are expecting a real number as the output. However, estimating age accurately using regression is challenging. Even humans cannot accurately predict the age based on looking at a person. However, we have an idea of whether they are in their 20s or in their 30s. Because of this reason, it is wise to frame this problem as a classification problem where we try to estimate the age group the person is in. For example, age in the range of 0–2 is a single class, 4–6 is another class and so on.
The Adience dataset has 8 classes divided into the following age groups [(0–2), (4–6), (8–12), (15–20), (25–32), (38–43), (48–53), (60–100)]. Thus, the age prediction network has 8 nodes in the final softmax layer indicating the mentioned age ranges.
It should be kept in mind that Age prediction from a single image is not a very easy problem to solve as the perceived age depends on a lot of factors and people of the same age may look pretty different in various parts of the world. Also, people try very hard to hide their real age!
2.How to Code
The code can be divided into four parts:
- Detect Faces
- Detect Gender
- Detect Age
- Display output
After you have downloaded the code, you can run it using the sample image provided or using the webcam.
python gad.py --imagesample1.jpgLet us have a look at the code for gender and age prediction using the DNN module in OpenCV. Please download the code as the code snippets are given below are only for the important parts of the code.
2.1. Detect Face
I will use the DNN Face Detector for face detection. The model is only 2.7MB and is pretty fast even on the CPU. More details about the face detector can be found in our blog on Face Detection. The face detection is done using the function getFaceBox as shown below.
def highlightFace(net, frame, conf_threshold=0.7):
frameOpencvDnn=frame.copy()
frameHeight=frameOpencvDnn.shape[0]
frameWidth=frameOpencvDnn.shape[1]
blob=cv2.dnn.blobFromImage(frameOpencvDnn, 1.0, (300, 300), [104, 117, 123], True, False)
net.setInput(blob)
detections=net.forward()
faceBoxes=[]
for i in range(detections.shape[2]):
confidence=detections[0,0,i,2]
if confidence>conf_threshold:
x1=int(detections[0,0,i,3]*frameWidth)
y1=int(detections[0,0,i,4]*frameHeight)
x2=int(detections[0,0,i,5]*frameWidth)
y2=int(detections[0,0,i,6]*frameHeight)
faceBoxes.append([x1,y1,x2,y2])
cv2.rectangle(frameOpencvDnn, (x1,y1), (x2,y2), (0,255,0), int(round(frameHeight/150)), 8)
return frameOpencvDnn,faceBoxes
2.2. Predict Gender
I will load the gender network into memory and pass the detected face through the network. The forward pass gives the probabilities or confidence of the two classes. I take the max of the two outputs and use it as the final gender prediction.
genderProto="gender_deploy.prototxt"
genderModel="gender_net.caffemodel"
genderList=['Male','Female']
MODEL_MEAN_VALUES=(78.4263377603, 87.7689143744, 114.895847746)
genderNet=cv2.dnn.readNet(genderModel,genderProto)
blob=cv2.dnn.blobFromImage(face, 1.0, (227,227), MODEL_MEAN_VALUES, swapRB=False)
genderNet.setInput(blob)
genderPreds=genderNet.forward()
gender=genderList[genderPreds[0].argmax()]
print(f'Gender: {gender}')
2.3. Predict Age
I load the age network and use the forward pass to get the output. Since the network architecture is similar to the Gender Network, we can take the max out of all the outputs to get the predicted age group.
ageProto="age_deploy.prototxt"
ageModel="age_net.caffemodel"
MODEL_MEAN_VALUES=(78.4263377603, 87.7689143744, 114.895847746)
ageList=['(0-2)', '(4-6)', '(8-12)', '(15-20)', '(25-32)', '(38-43)', '(48-53)', '(60-100)']
ageNet=cv2.dnn.readNet(ageModel,ageProto)
blob=cv2.dnn.blobFromImage(face, 1.0, (227,227), MODEL_MEAN_VALUES, swapRB=False)
ageNet.setInput(blob)
agePreds=ageNet.forward()
age=ageList[agePreds[0].argmax()]
print(f'Age: {age[1:-1]} years')
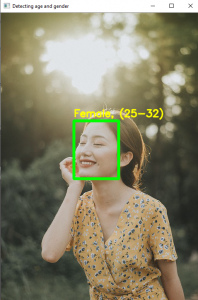
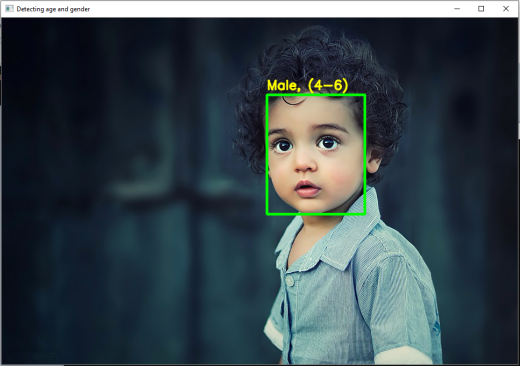
2.4. Display Output
I will display the output of the network on the input images and show them using the imshow function.
cv2.putText(resultImg, f'{gender}, {age}', (faceBox[0], faceBox[1]-10), cv2.FONT_HERSHEY_SIMPLEX, 0.8, (0,255,255), 2, cv2.LINE_AA)cv2.imshow("Detecting age and gender", resultImg)If you have video and then we need to identify faces through it.
video=cv2.VideoCapture(args.image if args.image else 0)
padding=20
while cv2.waitKey(1)<0:
hasFrame,frame=video.read()
if not hasFrame:
cv2.waitKey()
break
resultImg,faceBoxes=highlightFace(faceNet,frame)
if not faceBoxes:
print("No face detected")
for faceBox in faceBoxes:
face=frame[max(0,faceBox[1]-padding):
min(faceBox[3]+padding,frame.shape[0]-1),max(0,faceBox[0]-padding)
:min(faceBox[2]+padding, frame.shape[1]-1)]
Python Project Examples for Gender and Age Detection
Let’s try this gender and age classifier out on some of our own images now.
I’ll get to the command prompt, run our script with the image option, and specify an image to classify:
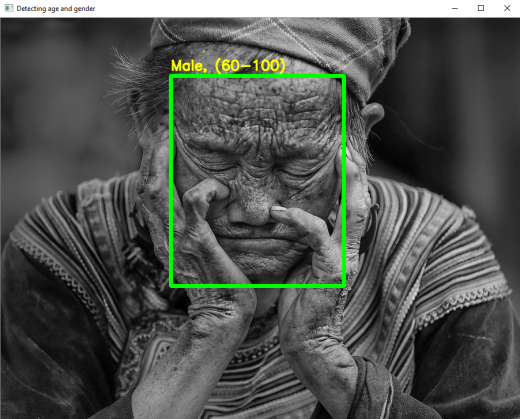
Example 1
input:
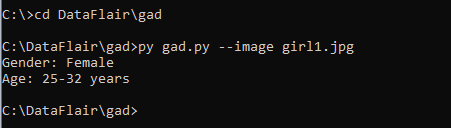
output:
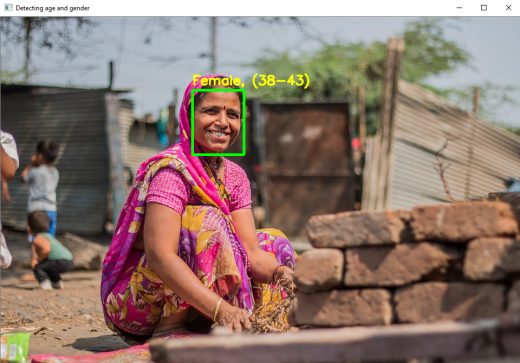
Example 2
input:

output:
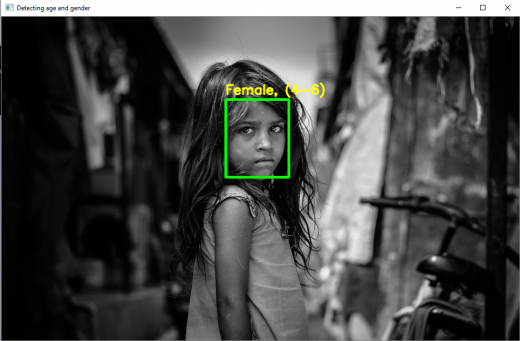
Example 3
input:

output:
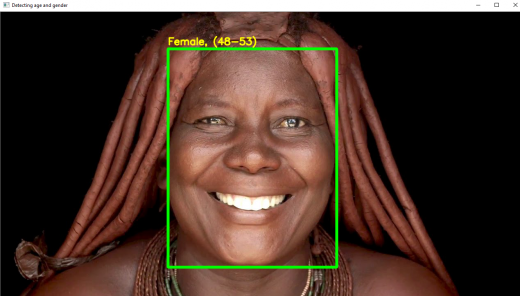
Example 4
input:

output:
Example 5
input:

output:
Example 6
input:

output:
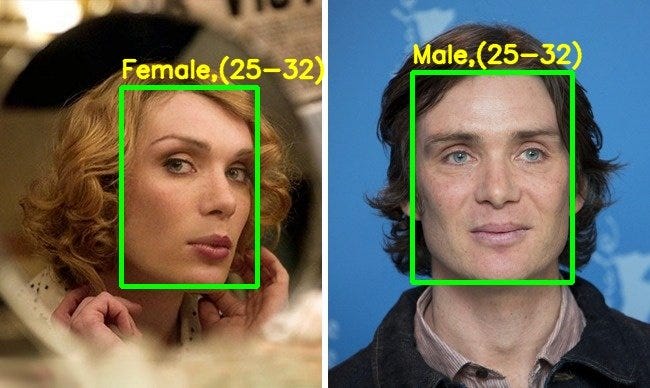
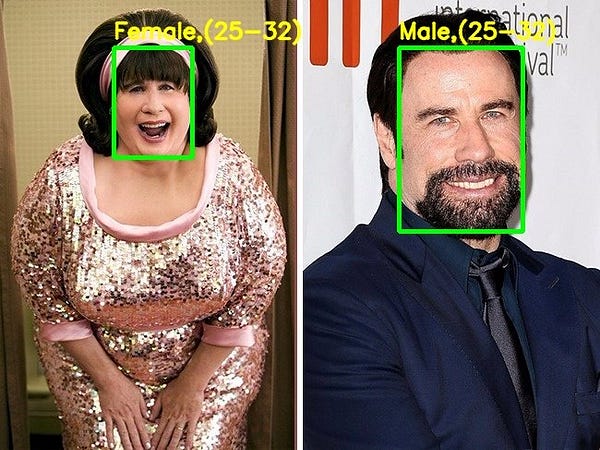
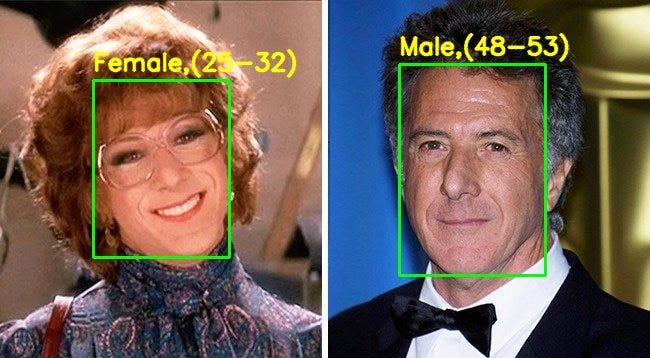
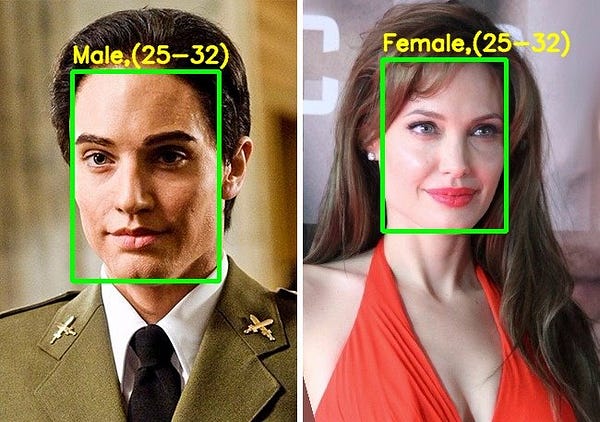
We saw above that the network is able to predict both Gender and Age to a high level of accuracy. Next, we wanted to do something interesting with this model. Many actors have portrayed the role of the opposite gender in movies.
We want to check what AI says about their looks in these roles and whether they are able to fool the AI.
I used images from this article which shows their actual photographs along with those from the movies in which they changed their gender. Let’s have a look.
Observations
Even though the gender prediction network performed well, the age prediction network fell short of our expectations. I tried to find the answer in the paper and found the following confusion matrix for the age prediction model.
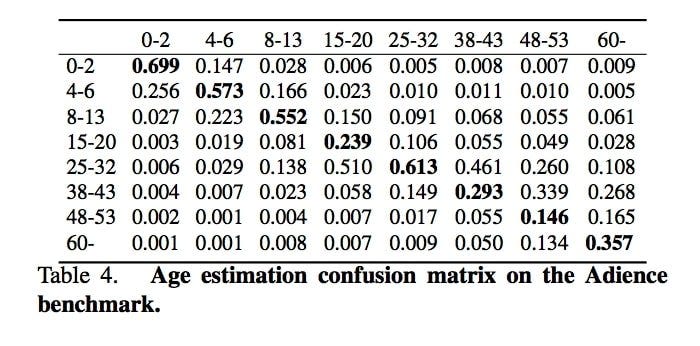
The following observations can be made from the above table :
- The age groups 0–2, 4–6, 8–13, and 25–32 are predicted with relatively high accuracy. ( see the diagonal elements )
- The output is heavily biased towards the age group 25–32 ( see the row belonging to the age group 25–32 ). This means that it is very easy for the network to get confused between the ages of 15 to 43. So, even if the actual age is between 15–20 or 38–43, there is a high chance that the predicted age will be 25–32. This is also evident from the Results section.
Apart from this, I observed that the accuracy of the models improved if I use padding around the detected face. This may be due to the fact that the input while training was standard face images and not closely cropped faces that we get after face detection.
I also analyzed the use of face alignment before making predictions and found that the predictions improved for some examples but at the same time, it became worse for some. It may be a good idea to use alignment if you are mostly working with non-frontal faces.
Thank You For Reading!
We’ll get to the command prompt, run our script with the image option and specify an image to classify:
Python Project Example 1