Creating ASP.NET Web API With React
Creating ASP.NET Web API With React

In this article, I’m going to perform CRUD operations using React.js and ASP.NET Web API. ReactJS is an open-source JavaScript library that is used for creating user interfaces. It is developed and maintained by Facebook. Learn more about React here.
Prerequisites
- We should have the basic knowledge of React.js and Web API.
- Visual Studio and Visual Studio Code IDE should be installed on your system.
- SQL Server Management Studio.
Technologies we will use:
Step 1: Create a Table in the Database
Open SQL Server Management Studio, create a database named “CrudDemo,” and in this database, create a table. Give that table a name like “studentmaster.”
USE [CrudDemo]
GO
CREATE TABLE [dbo].[studentmaster](
[Id] [int] IDENTITY(1,1) NOT NULL,
[Name] [varchar](50) NULL,
[RollNo] [varchar](50) NULL,
[Class] [varchar](50) NULL,
[Address] [varchar](50) NULL,
CONSTRAINT [PK_studentmaster] PRIMARY KEY CLUSTERED
(
[Id] ASC
)WITH (PAD_INDEX = OFF, STATISTICS_NORECOMPUTE = OFF, IGNORE_DUP_KEY = OFF, ALLOW_ROW_LOCKS = ON, ALLOW_PAGE_LOCKS = ON) ON [PRIMARY]
) ON [PRIMARY]
GO
Create a New Web API Project
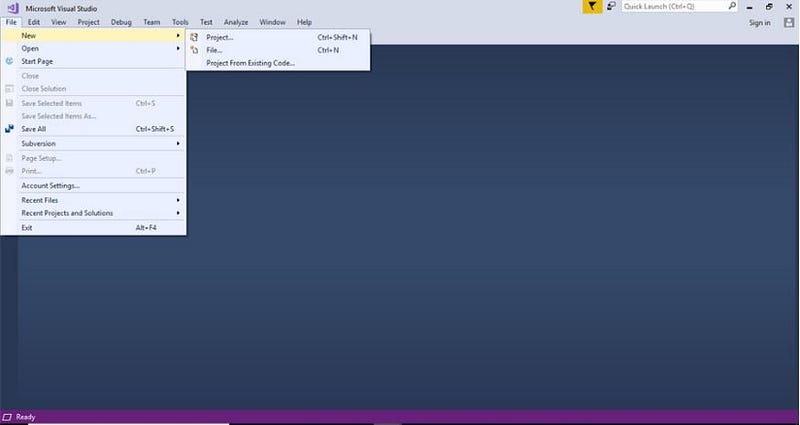
Step 2: Create a New Project.
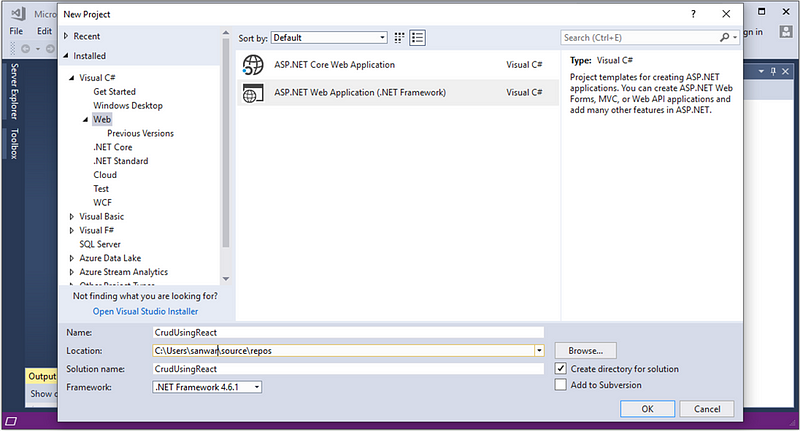
Step 3: Change the Name to CrudUsingReact
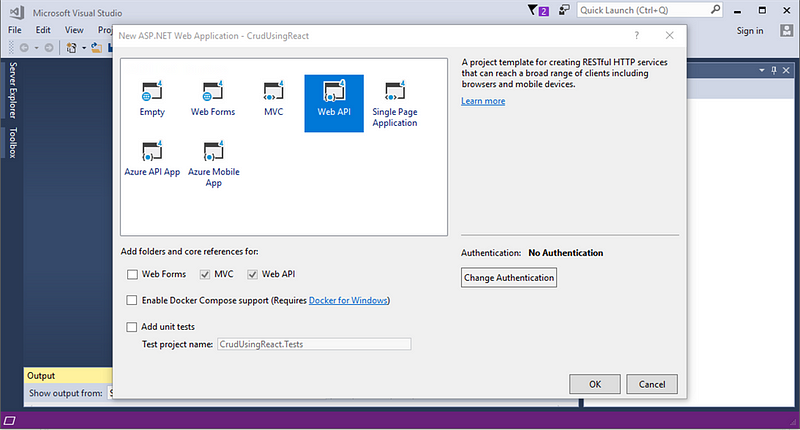
Step 4: Choose the Web API Template
Step 5
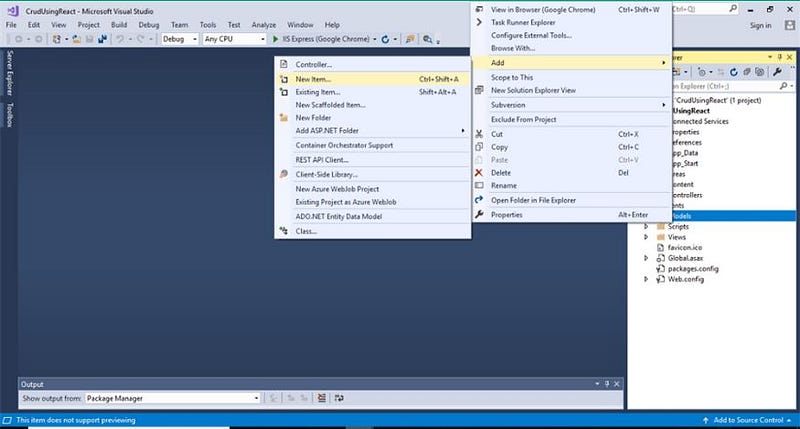
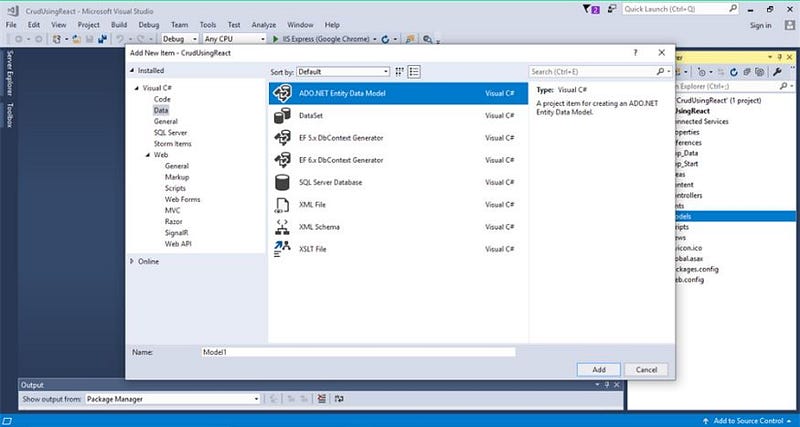
Right-click the Models folder from Solution Explorer and go to Add >> New Item >> data.
Step 6
Click on the “ADO.NET Entity Data Model” option and click “Add.”
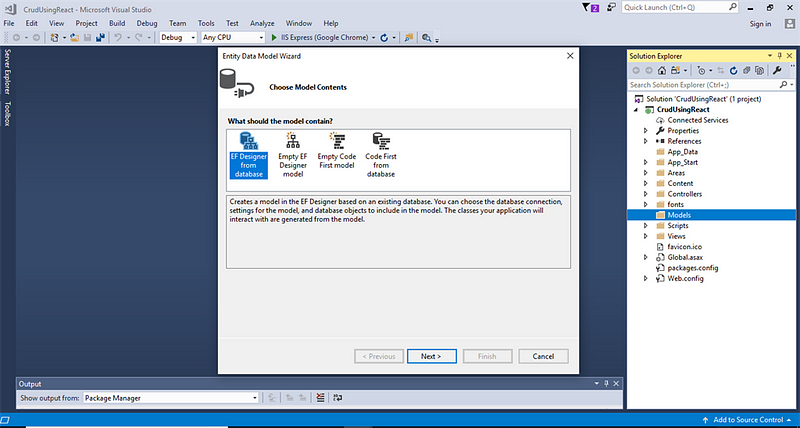
Step 7
Select EF Designer from the database and click the “Next” button.
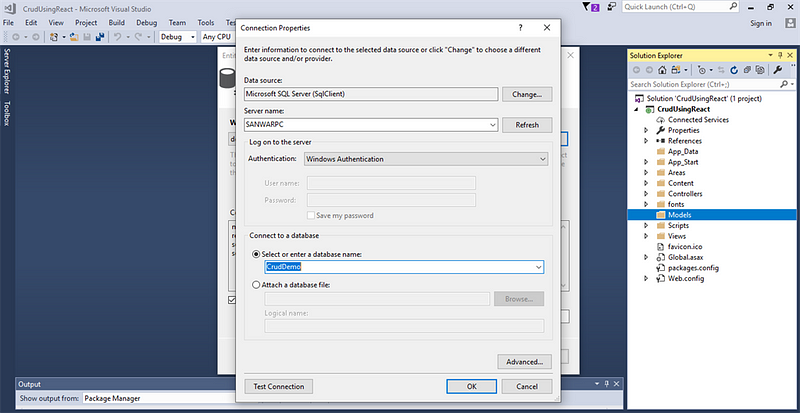
Step 8
Add the connection properties and select database name on the next page and click OK.
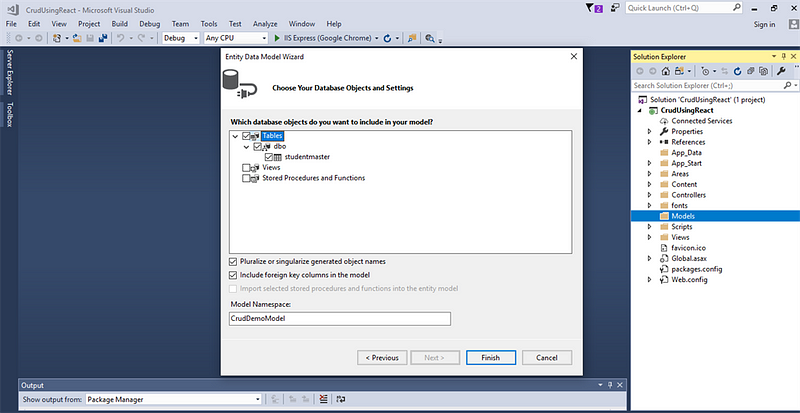
Step 9
Check the “Table” checkbox. The internal options will be selected by default. Now, click the “Finish” button.
Step 10
Right-click on Models folder and add two classes — Student and Response. Now, paste the following codes in these classes:
public class Student
{
public string Name { get; set; }
public string Rollno { get; set; }
public string Class { get; set; }
public string Address { get; set; }
}
public class Response
{
public string Status { get; set; }
public string Message { get; set; }
}
Step 11
Right-click on the Controllers folder and add a new controller. Name it “Student controller” and add the following namespace in the Student controller.
using CrudUsingReact.Models;
Step 12
Now, add a method to insert and update data into the database.
[Route("AddotrUpdatestudent")]
[HttpPost]
public object AddotrUpdatestudent(Student st)
{
try
{
if (st.Id == 0)
{
studentmaster sm = new studentmaster();
sm.Name = st.Name;
sm.RollNo = st.Rollno;
sm.Address = st.Address;
sm.Class = st.Class;
DB.studentmasters.Add(sm);
DB.SaveChanges();
return new Response
{
Status = "Success",
Message = "Data Successfully"
};
}
else
{
var obj = DB.studentmasters.Where(x => x.Id == st.Id).ToList().FirstOrDefault();
if (obj.Id > 0)
{
obj.Name = st.Name;
obj.RollNo = st.Rollno;
obj.Address = st.Address;
obj.Class = st.Class;
DB.SaveChanges();
return new Response
{
Status = "Updated",
Message = "Updated Successfully"
};
}
}
}
catch (Exception ex)
{
Console.Write(ex.Message);
}
return new Response
{
Status = "Error",
Message = "Data not insert"
};
}
Step 13
Add other methods to delete and fetch data respectively from the database.
[Route("Deletestudent")]
[HttpDelete]
public object Deletestudent(int id)
{
var obj = DB.studentmasters.Where(x => x.Id == id).ToList().FirstOrDefault();
DB.studentmasters.Remove(obj);
DB.SaveChanges();
return new Response
{
Status = "Delete",
Message = "Delete Successfuly"
};
}
[HttpGet]
public object Studentdetails()
{
var a = DB.studentmasters.ToList();
return a;
}
Complete Student Controller Code
using System;
using System.Collections.Generic;
using System.Linq;
using System.Net;
using System.Net.Http;
using System.Web.Http;
using CrudUsingReact.Models;
namespace CrudUsingReact.Controllers
{
[RoutePrefix("Api/Student")]
public class studentController : ApiController
{
CrudDemoEntities DB = new CrudDemoEntities();
[Route("AddotrUpdatestudent")]
[HttpPost]
public object AddotrUpdatestudent(Student st)
{
try
{
if (st.Id == 0)
{
studentmaster sm = new studentmaster();
sm.Name = st.Name;
sm.RollNo = st.RollNo;
sm.Address = st.Address;
sm.Class = st.Class;
DB.studentmasters.Add(sm);
DB.SaveChanges();
return new Response
{
Status = "Success",
Message = "Data Successfully"
};
}
else
{
var obj = DB.studentmasters.Where(x => x.Id == st.Id).ToList().FirstOrDefault();
if (obj.Id > 0)
{
obj.Name = st.Name;
obj.RollNo = st.RollNo;
obj.Address = st.Address;
obj.Class = st.Class;
DB.SaveChanges();
return new Response
{
Status = "Updated",
Message = "Updated Successfully"
};
}
}
}
catch (Exception ex)
{
Console.Write(ex.Message);
}
return new Response
{
Status = "Error",
Message = "Data not insert"
};
}[Route("Studentdetails")]
[HttpGet]
public object   Studentdetails()
{
var a = DB.studentmasters.ToList();
return a;
}[Route("StudentdetailById")]
[HttpGet]
public object StudentdetailById(int id)
{var obj = DB.studentmasters.Where(x => x.Id == id).ToList().FirstOrDefault();
return obj;
}
[Route("Deletestudent")]
[HttpDelete]
public object Deletestudent(int id)
{
var obj = DB.studentmasters.Where(x => x.Id == id).ToList().FirstOrDefault();
DB.studentmasters.Remove(obj);
DB.SaveChanges();
return new Response
{
Status = "Delete",
Message = "Delete Successfuly"
};
}
}
}
Step 14
Now, let’s enable CORS. Go to Tools, open NuGet Package Manager, search for CORS, and install the “Microsoft.Asp.Net.WebApi.Cors” package. Open Webapiconfig.cs and add the following lines:
EnableCorsAttribute cors = new EnableCorsAttribute("*", "*", "*");
config.EnableCors(cors);
Create React.js Project
Step 15
To create a new ReactJS project, open the command prompt, and enter the following command:
npx create-react-app crudwithceactjs
Open the newly created project in Visual Studio Code and install Reactstrap and Bootstrap by using the following commands:
npm install --save bootstrap
npm install --save reactstrap react react-dom
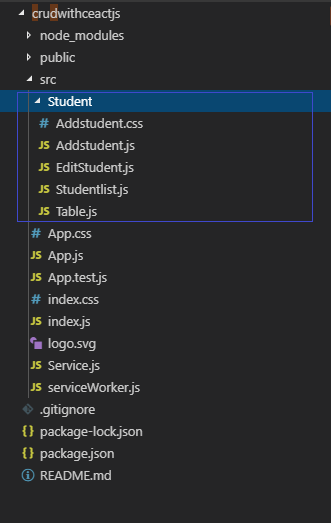
Step 16
Now, go to the “src” folder and add a new folder “Student” and four new components:
- Addstudent.js
- Studentlist.js
- Editstudent.js
- Table.js
Step 17
Install the Axios library by using the following command. Learn more about Axios library
npm install --save axios
Step 18
Add routing: Use the following command to add routing in React.
npm install react-router-dom --save
Step 19
Now, open the Addstudent.js file and add the following code:
import React from 'react';
import axios from 'axios';
import '../Student/Addstudent.css'
import { Container, Col, Form, Row, FormGroup, Label, Input, Button } from 'reactstrap';
class Addstudent extends React.Component{constructor(props){
super(props)
this.state = {
Name:'',
RollNo:'',
Class:'',
Address:''
}
}Addstudent=()=>{
axios.post('http://localhost:52564/Api/Student/AddotrUpdatestudent/', {Name:this.state.Name,RollNo:this.state.RollNo,
Class:this.state.Class, Address:this.state.Address})
.then(json => {
if(json.data.Status==='Success'){
console.log(json.data.Status);
alert("Data Save Successfully");
this.props.history.push('/Studentlist')
}
else{
alert('Data not Saved');
debugger;
this.props.history.push('/Studentlist')
}
})
}
handleChange= (e)=> {
this.setState({[e.target.name]:e.target.value});
}render() {
return (
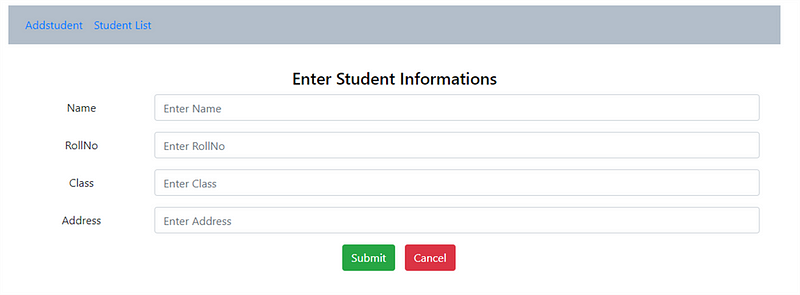
<Container className="App">
<h4 className="PageHeading">Enter Student Informations</h4>
<Form className="form">
<Col>
<FormGroup row>
<Label for="name" sm={2}>Name</Label>
<Col sm={10}>
<Input type="text" name="Name" onChange={this.handleChange} value={this.state.Name} placeholder="Enter Name" />
</Col>
</FormGroup>
<FormGroup row>
<Label for="address" sm={2}>RollNo</Label>
<Col sm={10}>
<Input type="text" name="RollNo" onChange={this.handleChange} value={this.state.RollNo} placeholder="Enter RollNo" />
</Col>
</FormGroup><FormGroup row>
<Label for="Password" sm={2}>Class</Label>
<Col sm={10}>
<Input type="text" name="Class" onChange={this.handleChange} value={this.state.Class} placeholder="Enter Class" />
</Col>
</FormGroup>
<FormGroup row>
<Label for="Password" sm={2}>Address</Label>
<Col sm={10}>
<Input type="text" name="Address" onChange={this.handleChange} value={this.state.Address} placeholder="Enter Address" />
</Col>
</FormGroup>
</Col>
<Col>
<FormGroup row>
<Col sm={5}>
</Col>
<Col sm={1}>
<button type="button" onClick={this.Addstudent} className="btn btn-success">Submit</button>
</Col>
<Col sm={1}>
<Button color="danger">Cancel</Button>{' '}
</Col><Col sm={5}>
</Col>
</FormGroup>
</Col>
</Form>
</Container>
);
}
}export default Addstudent;
Add a new file Addstudet.css file and add the following CSS classes. Import this file in the Addstudent.js component.
.PageHeading
{
margin-top: 10px;
margin-bottom: 10px;
color :black !important;
}
Step 20
Now, add a Table.js file and add the following code:
import React, { Component } from 'react';
import axios from 'axios';
import { Link } from 'react-router-dom';
class Table extends Component {
constructor(props) {
super(props);
}DeleteStudent= () =>{
axios.delete('http://localhost:52564/Api/Student/Deletestudent?id='+this.props.obj.Id)
.then(json => {
if(json.data.Status==='Delete'){
alert('Record deleted successfully!!');
}
})
}render() {
return (
<tr>
<td>
{this.props.obj.Name}
</td><td>
{this.props.obj.RollNo}
</td>
<td>
{this.props.obj.Class}
</td>
<td>
{this.props.obj.Address}
</td>
<td>
<Link to={"/edit/"+this.props.obj.Id} className="btn btn-success">Edit</Link>
</td>
<td>
<button type="button" onClick={this.DeleteStudent} className="btn btn-danger">Delete</button>
</td>
</tr>
);
}
}
export default Table;
Step 21
Now, add a studentlist.js file and add the following code.
import React, { Component } from 'react';
import axios from 'axios';
import Table from './Table';
export default class Studentlist extends Component {
constructor(props) {
super(props);
this.state = {business: []};
}componentDidMount(){
debugger;
axios.get('http://localhost:52564/Api/Student/Studentdetails')
.then(response => {
this.setState({ business: response.data });
debugger;
})
.catch(function (error) {
console.log(error);
})
}tabRow(){
return this.state.business.map(function(object, i){
return <Table obj={object} key={i} />;
});
}render() {
return (
<div>
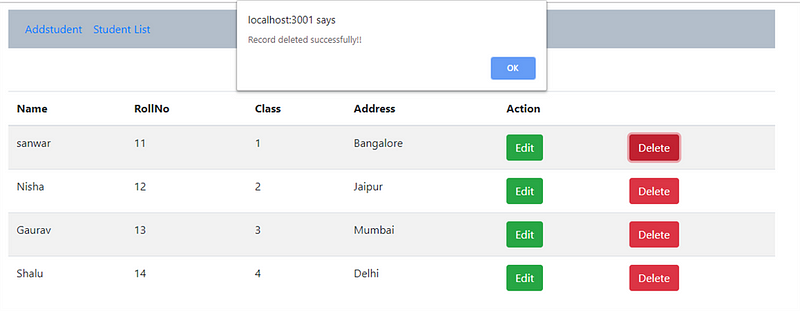
<h4 align="center">Student List</h4>
<table className="table table-striped" style={{ marginTop: 10 }}>
<thead>
<tr>
<th>Name</th>
<th>RollNo</th>
<th>Class</th>
<th>Address</th>
<th colSpan="4">Action</th>
</tr>
</thead>
<tbody>
{ this.tabRow() }
</tbody>
</table>
</div>
);
}
}Step 22
Add EditStudent.js file with the following code:
import React from 'react';
import { Container, Col, Form, Row, FormGroup, Label, Input, Button } from 'reactstrap';
import axios from 'axios'
import '../Student/Addstudent.css'
class Edit extends React.Component {
constructor(props) {
super(props)
this.onChangeName = this.onChangeName.bind(this);
this.onChangeRollNo = this.onChangeRollNo.bind(this);
this.onChangeClass = this.onChangeClass.bind(this);
this.onChangeAddress = this.onChangeAddress.bind(this);
this.onSubmit = this.onSubmit.bind(this);
this.state = {
Name: '',
RollNo: '',
Class: '',
Address: ''
}
}componentDidMount() {
axios.get('http://localhost:52564/Api/Student/StudentdetailById?id='+this.props.match.params.id)
.then(response => {this.setState({
Name: response.data.Name,
RollNo: response.data.RollNo,
Class: response.data.Class,
Address: response.data.Address });
})
.catch(function (error) {
console.log(error);
})
}onChangeName(e) {
this.setState({
Name: e.target.value
});
}onChangeRollNo(e) {
this.setState({
RollNo: e.target.value
});
}onChangeClass(e) {
this.setState({
Class: e.target.value
});
}onChangeAddress(e) {
this.setState({
Address: e.target.value
});
}onSubmit(e) {
debugger;
e.preventDefault();
const obj = {
Id:this.props.match.params.id,
Name: this.state.Name,
RollNo: this.state.RollNo,
Class: this.state.Class,
Address: this.state.Address
};axios.post('http://localhost:52564/Api/Student/AddotrUpdatestudent/', obj)
.then(res => console.log(res.data));
debugger;
this.props.history.push('/Studentlist')
}render() {
return (
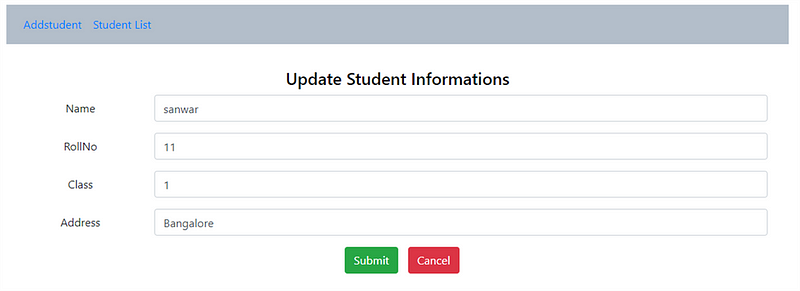
<Container className="App">
<h4 className="PageHeading">Update Student Informations</h4>
<Form className="form" onSubmit={this.onSubmit}>
<Col>
<FormGroup row>
<Label for="name" sm={2}>Name</Label>
<Col sm={10}>
<Input type="text" name="Name" value={this.state.Name} onChange={this.onChangeName}
placeholder="Enter Name" />
</Col>
</FormGroup><FormGroup row>
<Label for="Password" sm={2}>RollNo</Label>
<Col sm={10}>
<Input type="text" name="RollNo" value={this.state.RollNo} onChange={this.onChangeRollNo} placeholder="Enter RollNo" />
</Col>
</FormGroup>
<FormGroup row>
<Label for="Password" sm={2}>Class</Label>
<Col sm={10}>
<Input type="text" name="Class" value={this.state.Class} onChange={this.onChangeClass} placeholder="Enter Class" />
</Col>
</FormGroup>
<FormGroup row>
<Label for="Password" sm={2}>Address</Label>
<Col sm={10}>
<Input type="text" name="Address"value={this.state.Address} onChange={this.onChangeAddress} placeholder="Enter Address" />
</Col>
</FormGroup>
</Col>
<Col>
<FormGroup row>
<Col sm={5}>
</Col>
<Col sm={1}>
<Button type="submit" color="success">Submit</Button>{' '}
</Col>
<Col sm={1}>
<Button color="danger">Cancel</Button>{' '}
</Col><Col sm={5}>
</Col>
</FormGroup>
</Col>
</Form>
</Container>
);
}
}export default Edit;
Step 23
Open the App.js file with the following code in it.
import React from 'react';
import Addstudent from './Student/Addstudent';
import Studentlist from './Student/Studentlist';
import EditStudent from './Student/EditStudent';
import { BrowserRouter as Router, Switch, Route, Link } from 'react-router-dom';
import './App.css';
function App() {
return (
<Router>
<div className="container">
<nav className="navbar navbar-expand-lg navheader">
<div className="collapse navbar-collapse" >
<ul className="navbar-nav mr-auto">
<li className="nav-item">
<Link to={'/Addstudent'} className="nav-link">Addstudent</Link>
</li>
<li className="nav-item">
<Link to={'/Studentlist'} className="nav-link">Student List</Link>
</li>
</ul>
</div>
</nav> <br />
<Switch>
<Route exact path='/Addstudent' component={Addstudent} />
<Route path='/edit/:id' component={EditStudent} />
<Route path='/Studentlist' component={Studentlist} />
</Switch>
</div>
</Router>
);
}
export default App;
Add the following CSS classes in the App.css file.
.App {
text-align: center;
}
.navheader{
margin-top: 10px;
color :black !important;
background-color: #b3beca!important
}Now, run the application by using the npm start command and check the result.
Click on the Add Student button to add a new record into the database.
Click on the Edit button to update a record.
Click on the Delete button to delete a record.
Summary
In this article, we learned how to perform CRUD operations using React, Asp.net Web API, and SQL Server.