Building Progressive Web Application with Angular
Building Progressive Web Application with Angular

Introduction
Progressive web apps are web applications built with technologies that make them behave like native apps. A benefit of progressive web apps is the ability to work smoothly when network coverage is unreliable. Also, unlike native apps, no installation is required, but they are faster than typical web apps. In this article, you’ll build a progressive web app with Angular and deploy it with Firebase.
Getting started
To build a progressive web app with Angular, you’ll build a small website in this tutorial. When you’re done, you’ll use the Lighthouse Chrome extension to test if your app is progressive. You can also clone this project from GitHub.

Creating a new Angular Project
To create a new Angular project via Angular CLI, you need to install Angular CLI on your machine. If Angular CLI is not installed on your machine yet, run the following command to install it globally:
npm install -g @angular/cli
Once Angular CLI is globally installed, you can proceed to create a new project with it. By default, Angular will generate test files that are not of use in this tutorial’s project. To prevent this generation, you’ll add the --skip-tests flag to the following command that will create a new project:
ng new ng-pwa --skip-tests
Creating a Web App Manifest
A web app manifest is a JSON file that contains configuration that gives a web application the ability to be saved on user’s home screen. It also defines its appearance and behavior when launched from the home screen. Web app manifest is a basic requirement for progressive web apps but can be used on any website.
To create a web app manifest for your app, navigate to the src/ folder and create a file named manifest.json in the root of the folder. Add the content below into the file:
{
   "name": "Angular Progressive Web App",
   "short_name": "Ng-PWA",
   "start_url": "./",
   "theme_color": "#008080",
   "background_color": "#008B8B",
   "display": "standalone",
   "description": "A PWA that is built with Angular",
   "icons": [
       {
           "src": "/assets/images/icons/icon-16x16.png",
           "sizes": "16x16",
           "type": "image/png"
       },
       {
            "src": "/assets/images/icons/icon-32x32.png",
            "sizes": "32x32",
            "type": "image/png"
        },
        {
            "src": "/assets/images/icons/icon-150x150.png",
            "sizes": "150x150",
            "type": "image/png"
        },
        {
            "src": "/assets/images/icons/icon-180x180.png",
            "sizes": "180x180",
            "type": "image/png"
        },
        {
            "src": "/assets/images/icons/icon-192x192.png",
            "sizes": "192x192",
            "type": "image/png"
        },
        {
            "src": "/assets/images/icons/icon-512x512.png",
            "sizes": "512x512",
            "type": "image/png"
        }
   ]
}
In our web app manifest, we defined the name that will be attached to our app icon on users’ home screen and a short_name that will replace it, in case it is too long. We also specified the landing page of the app, when launched from the home screen with start_url. The theme_color specifies the color the browser UI will assume when users visit our site. The background_color property controls the color of the background on which our app icon will be displayed when users launch our app from their home screen. With display, you specify if the browser UI should be hidden or not when users visit your site.
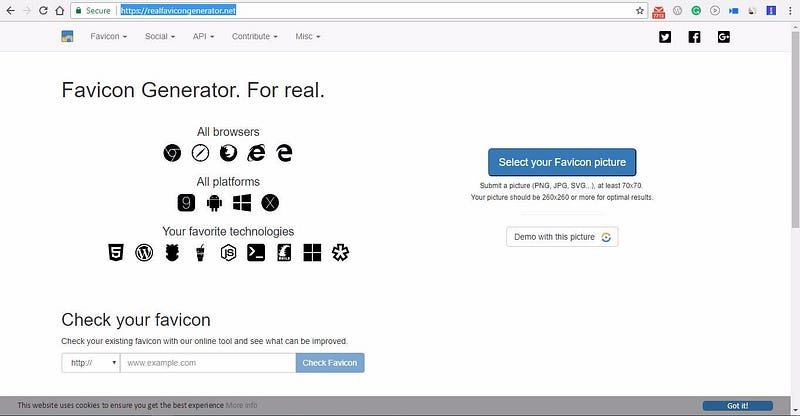
We expect users to visit our site with different types of devices with different screen sizes, so there is a need to make duplicates of your app icons in multiple dimensions. realfavicongenerator.net can help automate the process.
When you are done, go to the index.html file and add the following to the head section.
...
<link rel="manifest" href="/manifest.json">
<meta name="theme-color" content="#008080">
...
The web app manifest will not be added to the build folder unless we instruct Angular to do so. We will do that by adding the manifest.json file to the assets array in apps section of .angular-cli.json file:
...
"apps": [
    {
     ...
      "assets": [
       ...
        "manifest.json"
      ],
...
Adding Service Workers
Service workers are the foundation of progressive web apps. Written in JavaScript, they help cache important assets and files, which helps keep an app functional when the network coverage is unavailable or unreliable. Service workers can also intercept requests and manage responses from the server amid other things.
We need to build our app with webpack before pushing it to production and our service worker must be able to track and cache the build files. With the sw-precache-webpack-plugin npm package, we install the package and configure it. We can then run a command that will auto-generate the service worker in the build folder.
Run the npm install command to install the package:
npm install --save-dev sw-precache-webpack-plugin
Once the package is installed, go to the app root and create a file named precache-config.js. Add the following into the file:
var SWPrecacheWebpackPlugin = require('sw-precache-webpack-plugin');module.exports = {
navigateFallback: '/index.html',
navigateFallbackWhitelist: [],
stripePrefix: 'dist',
root: 'dist/',
plugins:[
new SWPrecacheWebpackPlugin({
cacheId: 'ng-pwa',
filename: 'service-worker.js',
staticFileGlobs: [
'dist/index.html',
'dist/**.js',
'dist/**.css'
],})
],
stripePrefix: 'dist/assets',
mergeStaticsConfig: true
};
The precache-config.js file configures the sw-precache-webpack-plugin using literal objects key-value pairs.
Angular as a front-end framework for building single-page applications uses client-side URL routing and can, therefore, generate arbitrary URLs that are not cached by the auto-generated service worker. In such situations we’ll define an HTML entry the requested URL will be mapped to and navigateFallback handles that. The HTML entry should be able to provide the desired resources. Because our app is a SPA and index.html is the entry point—it can handle arbitrary URLs—therefore it must be among the files selected to be cached in the staticFileGlobs array. navigateFallbackWhitelist can be empty or contains a regex that defines the type/pattern of URL that navigateFallback will be used for.
To get a deeper understanding of how to configure sw-precache-webpack-plugin , read its documentation.
To finish the service worker setup, we will create a custom npm script/command that will be used to build our app and auto-generate the service worker file in the build folder. Go to the package.json file and add the following to scripts:
...
"scripts": {
   ...
   "pwa": "ng build --prod && sw-precache --root=dist --config=precache-config.js"
 },
...
Checking the View
We only have a single view, since our primary focus is on the process of building progressive web apps with Angular.
<div class="container">
  <h1>
    A Progressive Web App Built with Angular.
  </h1>
  <img width="300" src="data:image/svg+xml;base64,PD94bWwgdmVyc2lvbj0iMS4wIiBlbmNvZGluZz0idXRmLTgiPz4NCjwhLS0gR2VuZXJhdG9yOiBBZG9iZSBJbGx1c3RyYXRvciAxOS4xLjAsIFNWRyBFeHBvcnQgUGx1Zy1JbiAuIFNWRyBWZXJzaW9uOiA2LjAwIEJ1aWxkIDApICAtLT4NCjxzdmcgdmVyc2lvbj0iMS4xIiBpZD0iTGF5ZXJfMSIgeG1sbnM9Imh0dHA6Ly93d3cudzMub3JnLzIwMDAvc3ZnIiB4bWxuczp4bGluaz0iaHR0cDovL3d3dy53My5vcmcvMTk5OS94bGluayIgeD0iMHB4IiB5PSIwcHgiDQoJIHZpZXdCb3g9IjAgMCAyNTAgMjUwIiBzdHlsZT0iZW5hYmxlLWJhY2tncm91bmQ6bmV3IDAgMCAyNTAgMjUwOyIgeG1sOnNwYWNlPSJwcmVzZXJ2ZSI+DQo8c3R5bGUgdHlwZT0idGV4dC9jc3MiPg0KCS5zdDB7ZmlsbDojREQwMDMxO30NCgkuc3Qxe2ZpbGw6I0MzMDAyRjt9DQoJLnN0MntmaWxsOiNGRkZGRkY7fQ0KPC9zdHlsZT4NCjxnPg0KCTxwb2x5Z29uIGNsYXNzPSJzdDAiIHBvaW50cz0iMTI1LDMwIDEyNSwzMCAxMjUsMzAgMzEuOSw2My4yIDQ2LjEsMTg2LjMgMTI1LDIzMCAxMjUsMjMwIDEyNSwyMzAgMjAzLjksMTg2LjMgMjE4LjEsNjMuMiAJIi8+DQoJPHBvbHlnb24gY2xhc3M9InN0MSIgcG9pbnRzPSIxMjUsMzAgMTI1LDUyLjIgMTI1LDUyLjEgMTI1LDE1My40IDEyNSwxNTMuNCAxMjUsMjMwIDEyNSwyMzAgMjAzLjksMTg2LjMgMjE4LjEsNjMuMiAxMjUsMzAgCSIvPg0KCTxwYXRoIGNsYXNzPSJzdDIiIGQ9Ik0xMjUsNTIuMUw2Ni44LDE4Mi42aDBoMjEuN2gwbDExLjctMjkuMmg0OS40bDExLjcsMjkuMmgwaDIxLjdoMEwxMjUsNTIuMUwxMjUsNTIuMUwxMjUsNTIuMUwxMjUsNTIuMQ0KCQlMMTI1LDUyLjF6IE0xNDIsMTM1LjRIMTA4bDE3LTQwLjlMMTQyLDEzNS40eiIvPg0KPC9nPg0KPC9zdmc+DQo=" alt="Angular logo">
<h2>Get Started With Progressive Web Apps: </h2>
  <ul>
    <li>
      <h4><a target="_blank" rel="noopener" href="https://developers.google.com/web/fundamentals/primers/service-workers/">Service Workers</a></h4>
    </li>
    <li>
      <h4><a target="_blank" rel="noopener" href="https://developers.google.com/web/fundamentals/web-app-manifest/">Web App Manifest</a></h4>
    </li>
    <li>
      <h4><a target="_blank" rel="noopener" href="https://developers.google.com/web/fundamentals/codelabs/your-first-pwapp/">Code Lab (PWA)</a></h4>
    </li>
  </ul>
</div>
The rel="noopener attribute is essential in progressive web apps if the anchor element’s target attribute is set to _blank for security and performance reasons:
Following is the CSS code:
body{
    background-color: teal;
}
.container{
text-align: center;
}ul{
list-style: none;
}h1, h2, a {
color: white;
}Deploying Your App
The service worker is the heartbeat of any progressive web app. However for the service worker to work fine, our app must be served over a secure connection. Hence, we will be deploying our app to Firebase, which hosts over a secure connection. You will be walked through the steps.
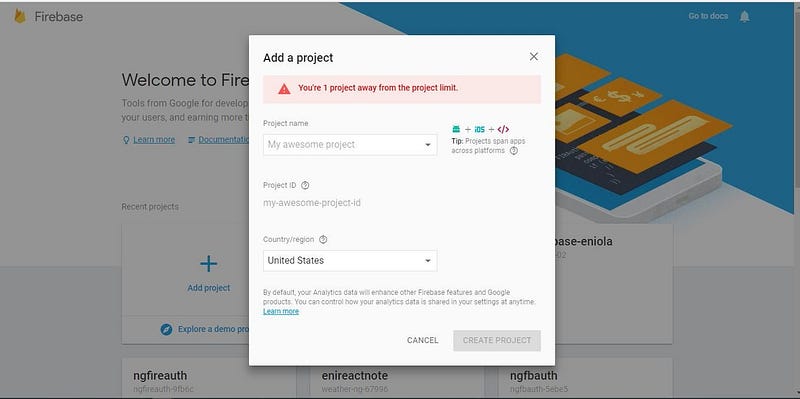
To get started, visit firebase.google.com. If you don’t have an account already, create one to have access to the console. From the console, create a new Firebase project.
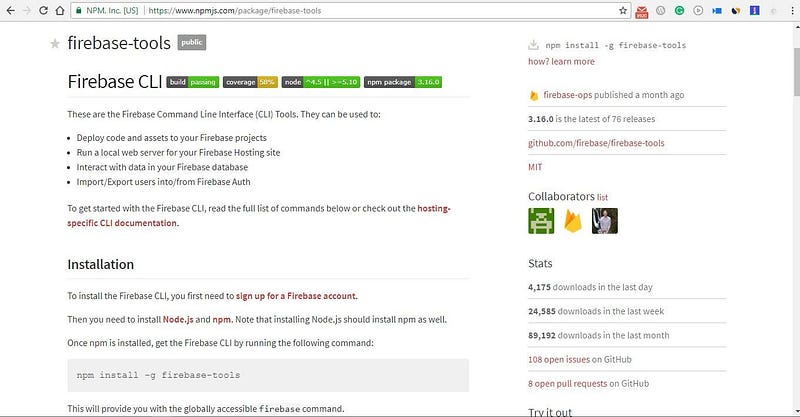
Once a new Firebase project has been created, go to the command terminal and navigate to your progressive web app folder. Run npm install -g firebase-tools to install firebase-tools globally. The firebase-tools package will allow us to test run and deploy apps to Firebase from the command terminal.
When the installation is complete, we need to build our app in preparation for deployment To build our Angular app and auto-generate the service worker, run npm run pwa. This runs a custom script we created earlier and makes our app production-ready.
Time to introduce Firebase to our app. Run firebase login command to log in to Firebase. Run the firebase init command to initialize Firebase in the project. Then answer the questions as follows:
- Are you ready to proceed? (Y/n) = Y
- Which Firebase CLI features do you want to setup for this folder? = Hosting
- Select a default Firebase project for this directory = Your-Firebase-Project-Name
- What do you want to use as your public directory? = dist
- Configure as a single-page app (rewrite all urls to /index.html)? (y/N) = Y
- File dist/index.html already exists. Overwrite? (y/N) = N
Our app is ready to be deployed. Run firebase deploy to deploy the app to Firebase.
Finally, run firebase open hosting: site to see your app.


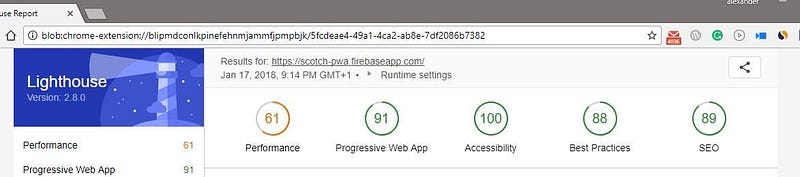
Testing with Lighthouse
Lighthouse is a Chrome extension made by Google. It can be used to test how compliant a progressive web app is to the progressive web app standard, in addition to other tests. The highest score is 100% and the PWA score for this app is 91%.
Conclusion
Progressive web apps provide users with an experience similar to native apps. However, PWAs are lighter and much more flexible. Angular is a popular front-end framework. In this article, you’ve built a progressive web app with Angular and deployed through Firebase.